Showing posts with label diy. Show all posts

8.03.2012

Bread!

I've always wanted to try making bread from scratch. No knead bread has been trendy lately, so I finally went ahead and used a recipe from Budget Bytes.

It turned out really well for a first time bread. Nice crispy crust like I like. Still kind of fluffy in the middle. I made rolls instead of a full loaf today. Still have half the dough waiting in the fridge to be used in the next week or so.

There are all kinds of fun variations to try - raisin bread, whole wheat...mmmm

Dough right after mixing
Loose fitting lid for dough to rise

Rolls cooling


Omnomnom bread!


7.01.2011

Planner Planning

I have recently started trying to downsize the stuff I carry around regularly.  I bought a new sling-bag that I love.


And a folding cane in the hopes that I might be able to fold it up and stick it in my bag now and then on good days.

Unfortunately, my current day planner is a smidge too big for my new bag.  I seriously need this planner.  I have a week across 2 pages section and a month across pages section that are absolutely vital for recording appointments, work schedule, migraines, and notes.  The daily pages get notes about meds I take as needed so I can keep track of when I can take the next dose plus have an idea of my med usage over time.
I especially like having a year or 6 months worth of stuff in the planner, it makes it much easier to show patterns of symptoms or note when medication dose changes or whatever happened.

It also has all my primary doctor contact info (business cards), plain note pages, and a pocket for stowing loose paperwork.

It measures 7" x 8.5" x 1.5" - kinda big and heavy, as it's faux leather, zips shut, and is the six-ring binder style.  The interior pages themselves are about 4" x 7"  Finding a new smaller, lighter cover seems like an obvious choice, but I'm having trouble finding one that isn't over $20-40 (I'm cheap).  I'm not sure if the binder rings from the one I have or another old one could be scavenged to make an new binder myself.  If anyone has any handy links about that, do please let me know.

So, I've been exploring other options.  DIY sounds fun, but I would prefer relatively little effort or lots of tracking down of supplies.  Something that I can get soon would be really nice too.

I've considered a hipster PDA, but the lack of easy flipping back and forth and longer-term organization would be a big problem for me.  It needs to be fairly sturdy too.  And I'm not confident plain paper will work or that my printer can handle index cards.

I've also looked at the PocketMod - nifty planner folded from a single sheet of paper.  I suppose I could print lots of them and bind them somehow.

I'd really like a super easy way to just print, fold in half, and staple a bunch of regular 8.5 x 11 paper, but haven't had much luck finding that sort of thing.

I have found some fill-in date (so I can start it when I want) planners that are adorable, but I'm not sure I want to make the leap.  But they are seriously adorable, so I wanted to share.
Vintage Typewriter Style
Stick a Bird on It!
Write Every Day

Flowers!

8.11.2009

Anticipation

We got the rental application and credit check stuff to the apartment management company today and should hear back in a few days about the apartment.
I'm getting very excited (as opposed to anxious) about the move, mostly because I have all sorts of possibly unrealistic plans for decorating. :P
As this is a garden apartment (ie in the basement), the windows are fairly short and up near the ceilings. So, I'm planning on getting some inexpensive white or natural muslin and a pretty trim to make curtains that won't block light. Overall, the potential for little natural light is pushing me toward trying to brighten rooms as much as possible with the decor - light, airy curtains, lighter colors with furniture, brighter colors, etc. Since our budget is tight, I really want to stick with inexpensive DIY stuff, preferably using as much stuff that we already have as possible.

Also on my list of things I really want to do:
  • Refinish a metal chest of drawers we have. I've been wanting to do this for years. The current paint is a dull beige and is peeling. One of the drawers has stickers on it that were painted over and this makes me crazy. I would like to strip down that drawer to get a smooth surface and then decoupage fabric or paper on the drawer surfaces and repaint the basic frame. This might be possible as this new place has a storage area right across from the back door of the apartment, so I could conceivably have Tom move the thing in there for me to paint and to let it dry without having excessive fumes in the apartment or the risk of paint mess.
  • Refinish a metal filing cabinet we have in the same manner.
  • Paint all of our pressboard el-cheapo bookcases so they match. I'm thinking white. I've also considered decoupaging them, though that could be a major headache with all the angles and corners. Also, all the painting has to be with a brush or roller because 1) I am not a fan of using spray paint indoors or outdoors in common areas; 2) spray paint is technically illegal in the city. I'm also not sure how many coats it would take to completely cover the faux woodgrain look.
  • Do something with the TV stand. It's black. It's kind of ugly. I'm actually thinking it might be a good candidate for Mod Podge/decoupage as well. A sufficiently heavy fabric would probably cover up the black fairly well. If I get something that coordinates with black, I only really need to do the little side doors.
  • Acquire and possibly re-paint and reupholster some extra chairs for guests. Upholstery scares me a bit, but I like chairs with cushions.
  • Do actual...decorating. Not crazy - I've never liked to have a lot of knickknacks, but I would like some more pretty touches. Vases with flowers. That sort of thing... I'd actually like some wall shelves to put little things in that I make more than any things else. At the moment, we don't really have a good display area. It's part of what keeps me from making more amigurumi - I don't want to give all of them away and I'm not always sure what to do with them otherwise.
  • I'm planning to crochet and/or knit some colorful potholders to hang up in the kitchen more as decoration than anything else.
  • I'd like to get rid of the desk I have now because it's monstrously big, has no real storage, and is a bit too modern for my tastes now. I'd much rather have a smaller writing desk or even an additional table at a good height. Mostly, I just need a sewing table and a "general other work" table - especially if I get going with Etsy, I'll need a place convenient to our printer that has room for putting together packages for mailing and filing paperwork.
  • Get some more storage for my fabric stash. At the moment, I probably only really need a clothing box or two.
  • Set up a good indoor photo area. I need to get better at photography, both doing it at all and making what I do better. Since mobility is kind of a problem for me, indoor is best. And since light is going to be at a bit of a premium, I'm going to have to figure out a setup. Fortunately, Tom is all about some photography, so I have a good resource. :)
I am also excited because I think I will be able to do laundry now! Currently our apartment is up two short flights of stairs. There is no way I can get down them while carrying a hamper. It's a bit too far to just drop the hamper over the side plus I'm not quite strong enough to do so. Then, the laundry room is down another flight of steps and behind a heavy door. So, poor Tom has to do all the laundry on top of everything else he does. The laundry room at the new (hopefully) place though is just three steps up, then across a nice flat concrete apron, and down a ramp (yay!). Plus there are comfy chairs and books in there if you want to hang out while your laundry is going. We're going to score either a wheeled hamper or a collapsible shopping cart (grocery store is also within more feasible walking distance) so I can do stuff.
So, with luck, I can do a bit more around the house. I'm also going to try very hard to do a bit of light housework every day. Mostly I need to find a good way to remind myself to do it. So, we'll see.

6.17.2009

Oreo Spa Night

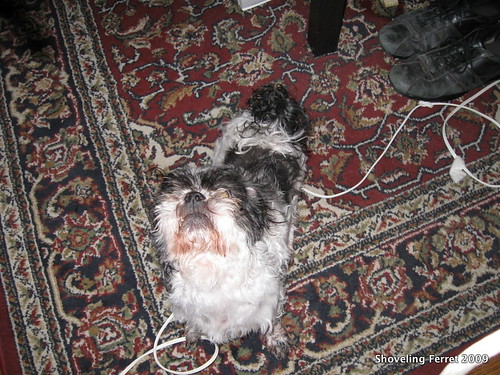
Oreo has been in desperate need of a haircut for a few weeks now and I kept forgetting to schedule an appointment for him to be groomed. We finally decided to just give it a try ourselves. We've done this a few times before in desperation and the results were...interesting.

Hey, Oreo! What did you think of the last haircut we gave you ourselves?
hell hound


This time it turned out much better. We sat him up on my shower chair in the tub, which made it much, much easier to reach all his parts. I talked to him and cuddled him while Tom did most of the clipping and cutting. We used ordinary hair clippers with a #4 guard for his body and a #2 for his legs. Then we went over some spots, especially his belly, with a beard trimmer. He absolutely hated having the clippers near his ears and jaw no matter how gentle I was, so we did most of the trimming around his face as well as his paws and toes with scissors. After shaving we vacuumed up all the hair in the tub with the ShopVac and then gave him a bath. Oreo wasn't exactly thrilled with us, but he does look very handsome now. Of course, if he had his way, he'd be one giant, smelly, itchy dreadlock.
Small wet dog


I think we'll keep on trying this in the future and maybe invest in a better set of pet clippers. It's certainly better than the $50-70 every few months we pay for his grooming.
Oreo damp

5.07.2009

Nest Decorating & Designs by Tamar: Duvet Tutorial and some more new work

Nest Decorating & Designs by Tamar: Duvet Tutorial and some more new work

I love this tutorial for making duvet covers from flat sheets - usually much, much less expensive than buying a ready-made cover and a good way to use or re-use vintage, thrifted, or older sheets.  It would be super simple to add your own decorative touches with appliques, borders, ribbons, buttons, etc.  I adore my down comforter and refuse to part with it, but duvet covers are a must and being able to customize is always appealing.

Via Craft

5.05.2009

The Cane Bow - DIY cane decoration

As I mentioned yesterday, I have also decided to make a bow to dress up my cane for the event this week.  I considered, and shopped for, a new cane altogether but decided against it for now.  My cane, while not a thing of beauty, is perfectly serviceable, lightweight, and has been improved dramatically by the removal of the branding stickers that were on it when I first received it.  Spending the money on a new cane just didn't seem wise, especially since I would have to order one rather than being able to test it out before buying.

Yesterday evening I picked up three rolls of wired ribbon from Michael's.  This evening, with my husband's help, I sat down to work on creating the bows.  Then I realized neither of us had the faintest clue what we were doing, so I did a quick Google search.  This was particularly helpful, though we didn't follow it very closely, so if you think the final result sucks, don't blame the tutorial authors.  
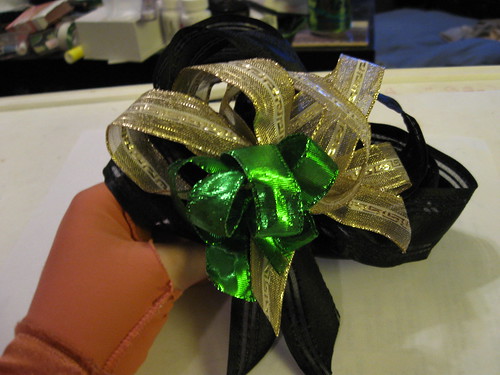
Making bows was a lot harder than I thought it would be.  My hands are less than happy right now, but I finally got it done.  It's held together with pipe-cleaners and attached to my cane using electrical tape.
Here is the bow prior to attachment, displayed in my stylishly craft-gloved hand:

Cane bow

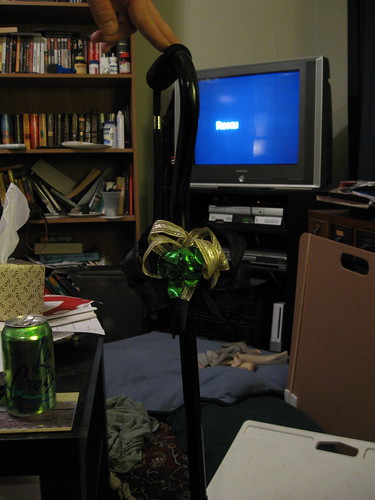
And here it is after attachment to my cane, with a lovely view of our cluttered living-room and the Roku screen-saver playing on the TV.

Stylin' Cane Bow

Pretty pimpin', eh?

I intend to be the most stylin' cripple around.  :P

4.15.2009

I do occasionally make something (Crochet Hook Handles Pre-Bake)

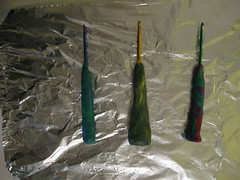
So, after stumbling onto a video showing how to make your own crochet hook handles I absolutely had to take my 40% off coupon down to the local Michaels and grab me a Sculpey color pack and some cheap aluminum Boye hooks. I love this idea, not just for the fun, easy DIY aspect, but also in hopes that these larger handles will help with my hand problems. (I recently scored a Clover Soft Touch and have enjoyed it, but DIY is even better.)
I spent a good part of this evening having loads of fun playing with the polymer clay, stuffing the hooks into it, and writing on the new handle bases (so I'll know what size the hook is). I basically taped some aluminum foil to my lap desk to give myself a reasonably flat, non-sticky, non-transfer surface to work with. Oreo was fascinated until he decided I was not doing anything truly food related. I'm waiting for the oven to heat as we speak so I can bake these bad boys. I'm looking forward to trying them out in the next day or two. I think I might have overworked my hands playing with the clay, but it was fun and therefore worth it.

DIY Dress Form

I found this via Craft today and am super excited - dress forms are pricey and while having one would be very handy for me, I haven't wanted to invest in one while I'm still not certain how devoted I am to the whole sewing thing.  However, this is cheap and I suspect it will be hilarious for my husband and me to do.

The materials list is essentially:
- a friend (you can't do this alone)
- a garbage bag
- scissors
- water activated packing/paper tape
- masking tape
- a sponge
- water
- a pole (they used an old Xmas tree trunk and tree stand and the video includes a link to other options)
- fabric scraps or expandable foam for stuffing
- several hours

How-to Make a Body Form

4.14.2009

DIY Star Trek Communicator

Trekker masynmachien and daughter created an excellent Instructable for those who would like to make their own TOS communicator complete with chirping noise.  Check it out!

Star Trek communicator from a discarded mouse - More DIY How To Projects

4.10.2009

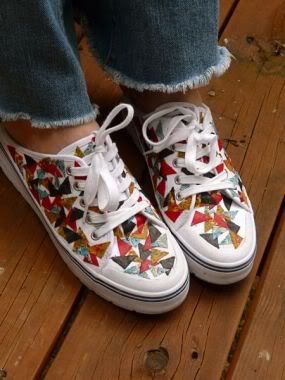
Customizable Shoes

CraftyStylish has posted this cool way to update plain canvas shoes using decoupage and scraps of fun fabric .  I love the idea of decorating my own shoes and considering how inexpensive plain canvas shoes can be, this looks like a blast


Recycled Fabric Shoes


How to Recycle Fabric Scraps...into Restyled Shoes! - CraftStylish

4.02.2009

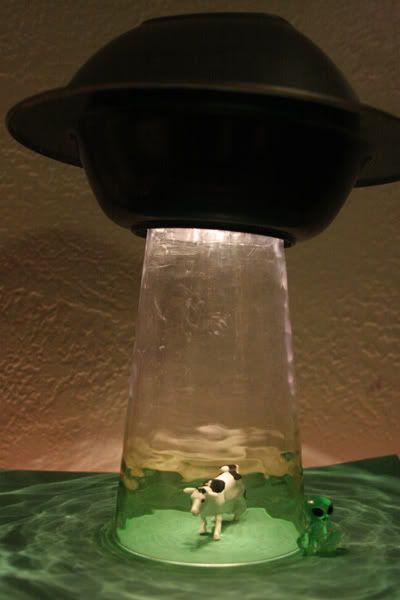
Make an Alien Abduction Lamp | Dollar Store Crafts

Make an Alien Abduction Lamp | Dollar Store Crafts


Alien Abduction Lamp
This is so cool.  When I have a craft room, I will have to make one of my own.

TUTORIAL: Make a Lined Zippered Pouch - PURSES, BAGS, WALLETS

TUTORIAL: Make a Lined Zippered Pouch - PURSES, BAGS, WALLETS

Hurray!  Yet more help in making bags!  I got some very sweet Asian-themed fat quarters and some remnants for lining at JoAnn's in Las Vegas for my birthday.  Now I've got to start cracking on the bag making.